I apologize in advance for the bad pictures - I hate to even post pictures on my blog lately as I still haven't gotten a new camera yet. But you'll get the idea anyway.
These are the technique cards for Diva Club on Friday. We will be doing reverse masking and sparkle plenty. See this post for more info on what a Diva Club is or type Diva into the search bar in the upper left hand corner!
This is the full card we will make using one of our newly learned techniques. Here, I've used the reverse masking to do the oval behind the scarecrow. 
Showing posts sorted by relevance for query diva. Sort by date Show all posts
Showing posts sorted by relevance for query diva. Sort by date Show all posts
Tuesday, October 14, 2008
October Diva Club
Wednesday, March 19, 2008
March Diva Club


It's almost time for our Diva Club meeting!
I spent most of the evening helping my son with a school project, but I did sneak in these two technique cards for this month's Diva's. The techniques requested by this month's hostess are Dryer Sheet and Faux Leather. Admittedly, I haven't done much of either one, so it was fun to get out all the stuff to make these samples. You can see the full card that we'll be making if you scroll down. Hope you're all keeping warm and dry tonight (lots of rain here in CNY). Thanks for checking in...See ya tomorrow!
Friday, May 16, 2008
Diva Kim

<--------- Another Diva, another cake!! This is Diva Kim (isn't she sweet?) She brought cake tonight for snack. It was the most delicious low fat orange cake. We were so excited to cut into it that I didn't even snap her picture before we dug in:)
Here's the recipie for her Orange Creamsicle Cake:
Mix together 1 white cake mix and 12 oz. of diet orange soda. (no eggs, oil, etc). Bake as directed.
For frosting, combine 8 oz. lite cool whip and 1 pkg of sugar free orange jello mix. That's it! And boy is it YUMMY! I wonder how lemon-lime would be, or how about cherry!!
I have the CNY swap tomorrow - can't wait! I'll post my goodies when I get home! Have a great weekend everyone!
Thursday, April 16, 2009
DIVA Project - 2-step, 3d Stamping with Soft Summer

Hi there! We have DIVA club this friday. For those of you who don't know about DIVA club, you can see more info here. If you have some friends and want to form a club, like this - let's talk!This is the full card project we'll be doing once we learn about 2-step, 3d stamping (a technique the hostess chose). I'm not sure if this is the official interpretation of the technique, but it's mine, so as thier fearless leader, I guess they'll have to love it:) The choc chip piece has been run through the cuttlebug using the small dots texturz plate. The new scallop oval punch was used to punch out a window from the front of the card and the celebrate oval is attached using dimensionals inside the card. Can't believe that break is almost over - hope you're enjoying yours!
Wednesday, February 13, 2008
Technique Cards for DIVA clubbers


 Here's a look at the technique cards we do as part of DIVA Club. My Diva's (as they voted to call themselves) each signed an agreement to spend $15 per month for 10 months. Everyone takes a turn playing "hostess". When it is their hostess month they get:
--hostess benefits according to the stampin' up! benefits chart
--20% of their merchandise total
--To choose the 2 techniques that we will learn that month.
--To bring the snack/drink for the others (AND we meet at my house so they don't have to clean theirs)
Everyone gets a technique card like the ones shown above with the directions printed on one side and during the club meeting, we all make the sample to adhere to the back of the card. These cards are printed on a different color cardstock each month so that after 6 months, you have a sampler ring of that color family (see soft subtles above).
Sounds like fun, huh? I am taking spots for a 2nd club! If you're interested, let me know and when I get 10 members (unless everyone wants to commit to spend more $ - then we'll need less members), we can start a 2nd club and you can call yourselves whatever you'd like!
Monday, March 7, 2011
Masculine Diva Swap Cards-2
Each month there are 10 Demo's that get together for the "Demo/Diva" club. The hostess for the month picks the swap theme and all the other members make swap cards using that theme. The hostess brings the Make & Take Project, so she doesn't have to make a swap card that month, but gets to take home one of everyone else's cards....it's a fun, fun group of gals. We always have alot of laughs! Here are the Masculine (boy or man) cards from February.Here is my swap card. It's supposed to look like one of those large stand up toolboxes: This is Sue's contribution
 Denise made this one:
 Gayla's contribution to our swap:
 And, Lindsay's Gate fold card:

Wednesday, February 13, 2008
Day 2!
Hi there,
Still playing around a bit with this bloggin' stuff! Actually, I won't even give the blog address out until I get a little better at it, but it's fun just to see posts! I'm excited to have DIVA club meet again this month after 2 months off. It's our first club since the new catalog came out! We'll be learning 2 new techniques: Shaker Cards and the Reflection Technique. After we complete our technique cards (busniess card sized samples for our color cardstock rings), we'll make a complete shaker card... the one posted below! If you are not a member of the DIVA club and would like more info on it, send me an email and I'll tell ya all about it! Guests are welcome to attend for free with a $15 order or for a fee of $5. (Fee covers materials for the full sized card and learning the technique).
Friday, April 11, 2008
April Technique Club Cards

 Hey there! Here are this month's DIVA Technique cards. We will be doing Poppin' Pastels and Stamping with Bleach. The little dots and the flower centers on the bleach tech card are done with the butt end of the paint brush dipped in bleach. Hope my Diva's like them... Hope you all have a great weekend ;)
Friday, September 18, 2009
September DIVA Club
Tonight was Jenn's last night at DIVA club. She's moving out of state and we will all miss her! Even though we had a small group tonight, we still wanted to send her off with some love! (disclaimer... Gayla has granted permission for this photo to be posted) 
These are this month's technique cards. Lindsay was the hostess this month (even though she was sick and couldn't make mtg). Hope you feel better Lindsay! She chose to do Scratch N Sniff and Faux Wood Frame Techniques. The orange was done using sugar free orange jello and embossing powder and the loaf of bread was done using cinnamon and Embossing Powder... Yummy! Look how the loaf pan shines - it's done using the new Shimer Paint in the Mini. It's also the "brads" on the faux wood frame - love it! The faux wood frame was not my favorite, but actually turned out to be a crowd pleaser!  And here is the front of the cards. Our rings are almost complete - only 6 more to go and we'll have all 48 colors of cardstock and 48 different techniques!
 And this is the full card we made using the scratch n sniff technique. The acorn smells like cinnamon! The girls used the bright blessings jumbo wheel on the chocolate chip piece too. (When I designed the card I forgot I had the wheel, lol)


 And here is the front of the cards. Our rings are almost complete - only 6 more to go and we'll have all 48 colors of cardstock and 48 different techniques!
 And this is the full card we made using the scratch n sniff technique. The acorn smells like cinnamon! The girls used the bright blessings jumbo wheel on the chocolate chip piece too. (When I designed the card I forgot I had the wheel, lol)
Monday, May 12, 2008
May Diva Club - Faux suede

This is the card for this month's Diva's. The hostess (hi Kim) wanted to do ghosting and faux suede for her 2 techniques. I had designed this card as a possible Demo Quality cardfront for the upcoming CNY gathering, but decided I wasn't a good enough watercolorer to try to create 16 of them and have them all look good. This card features faux suede (the long close to cocoa piece) and SU's watercolor paper - boy you can really add color to that stuff without it tearing apart like the cheaper stuff. I don't have the tech cards printed out yet (I'm so behind), so I can't show you those yet. Anyway, thanks for stopping by today!
Saturday, February 26, 2011
2011 Punch Art Calendar
I'm finally getting around to posting some old projects on my poor, neglected blog. Today marked the official end of hockey season, so weekends are actually going to be mine again!! This is a project that we worked on last year during DIVA club. We made 2 pages per meeting in no particular order. Each page consisted of punch art as most of the DIVA's had more stamps than they could possibly use, so I decided to focus on punches. When all the pages were complete, we had one night to create the cover and bind all the pages together using the Bind it All. Enjoy!


Friday, June 12, 2009
Cheers to you dad!

 This month's DIVA hostess wanted to make a gift card holder. I looked for something a bit different that I hadn't shown them before (they are getting quite accomplished!) I hope they have fun making this one tonight at DIVA club. I know not all dads drink as heavily as mine... lol, just kiddin' dad :) , but the images can be changed up to suit your dad, or grad, or mom, or sister, or teacher, or - well, you get the idea! Have a great weekend and don't forget to make something for father's day!
Sunday, September 7, 2008
Rolling Marble Technique

Each month, I hold a DIVA Club, where 10 girls have comitted to spend $15 each month and we all take turns being the hostess. The hostess of the month gets to pick 2 techniques to play with on the night of the meeting. This months hostess is Jenn (hi Jenn!) and she has chosen the Rolling Marble Technique as well as Faux metal. I have never tried the rolling marble technique, so I put aside my own safety and ventured into the floor of my kids' closet to see if I could find some marbles....
I didn't find marbles in the true sense, but I did find some round magnet thingies and they seemed to work just fine. I used tempting turquoise reinkers on a scrap of soft sky I had lying around. The flowers from Upsy Daisy are done using the faux dry embossing technique - first stamped in whisper white and then overstamped using basic gray. I think it came out okay for a first try. What do you think girls - is it DIVA worthy?
Monday, April 7, 2008
always popping pastels
 Today I was playing around with the popping pastels technique. This month's diva club hostess has chosen this as one of the group techniques. It's not my favorite technique, so I figured I'd better play around to see what I could come up with. The heart on the main image (I know this is a busy card, so you'll have to look hard for the main image.. LOL) is stamped with versamark on craft paper and then colored with my stampin pastels and a q-tip. I decided to go with something else for diva club, but didn't want this image to go to waste as it was okay.... so I made an okay card to go with it. Not my favorite card ever, but thought I'd share anyway. The other cool things about this card are the always is punched using my 1 1/4 punch and popped on dimensials on the green layer below which is punced with the 1 3/8 punch. The branch thingy that comes with this set has almost enough bend to it to make a wreath with. Thanks for stopping by!
Thursday, February 19, 2009
what do I do with those watercolor wonder crayons?
 That's what this month's DIVA hostess wanted to know.... so I ordered some (yes, I don't have EVERYTHING) and got to work. I'll be honest, I had a bit of a hard time achieving a look that I really liked. This card doesn't show very well, but the flowers are pretty IRL. To get these flowers, I first spritzed my inspired by nature stamp with water, then colored directly onto the stamp with the crayons, spritzed again a couple of times and stamped onto very vanilla cardstock. I'd seen a card much like this on SCS and decided to try it to see if it would work for my DIVA's. I hope they like it, as it's the card we will be doing friday night. We will also color with the crayons directly onto the paper and pick up color from the end of the crayon with an aqua brush. The card is called a tent topper and the base is cut to 4 1/4 x 8 1/2, then folded to make a 4 1/4 inch square. Then you make your focal image any size and shape you want and use a finished card or an envelope to determine placement onto your card base.... KWIM? Thanks for stopping by my rubber room today!
Monday, March 10, 2008
Laundry done - 'cause I need the dryer Sheet!

Well, It's almost tomorrow already, but I wanted to get you something today, like I said I would. After work, I came home and finished some swaps for this weekend and then got to work on a dryer sheet card requested for this month's DIVA Club hostess. The card is really shimmery in real life (and so am I after using that freakin' glitter). The dryer sheet technique is easy, just a wee bit messy as any glitter project is...
1. Just stamp an image that is bold enough to show through your dryer sheet onto neutral cardstock and color if desired.
2. Run your image face down through the xyron or spray with adhesive.
3. Adhere a used dryer sheet to the front and rub with dazzling diamond glitter.
4. That's pretty much it... see - easy peasy! If you make one, I'd love for you to post a link here.
Gotta go get a drink now to wash down that glitter stuck in the back of my throat :)
Friday, April 18, 2008
 Isn't she the sweetest DIVA ever.... this was Denise's month to be hostess and this is the snack she brought!! It tasted just as good as it looked too:) Thanks Denise.
Here's the full card we did as a group. The tech cards are down a few posts. The girls seemed to like it and even I was surprised that the bleach turned the rose red paper into an exact match for so saffron. The heart from always was embossed, then painted in with bleach. Once the bleach was dry, the rose red paper magically turned so saffron. The sentiment was stamped in rose red first and then just the word wonderful was "written" over with the fine tip of the black marker. TIP: When painting with bleach, use a bleach pen as it's a gel formula and easier to control than regular splashy bleach.
Monday, March 7, 2011
Masculine Diva Swap Cards
This one was made by Meg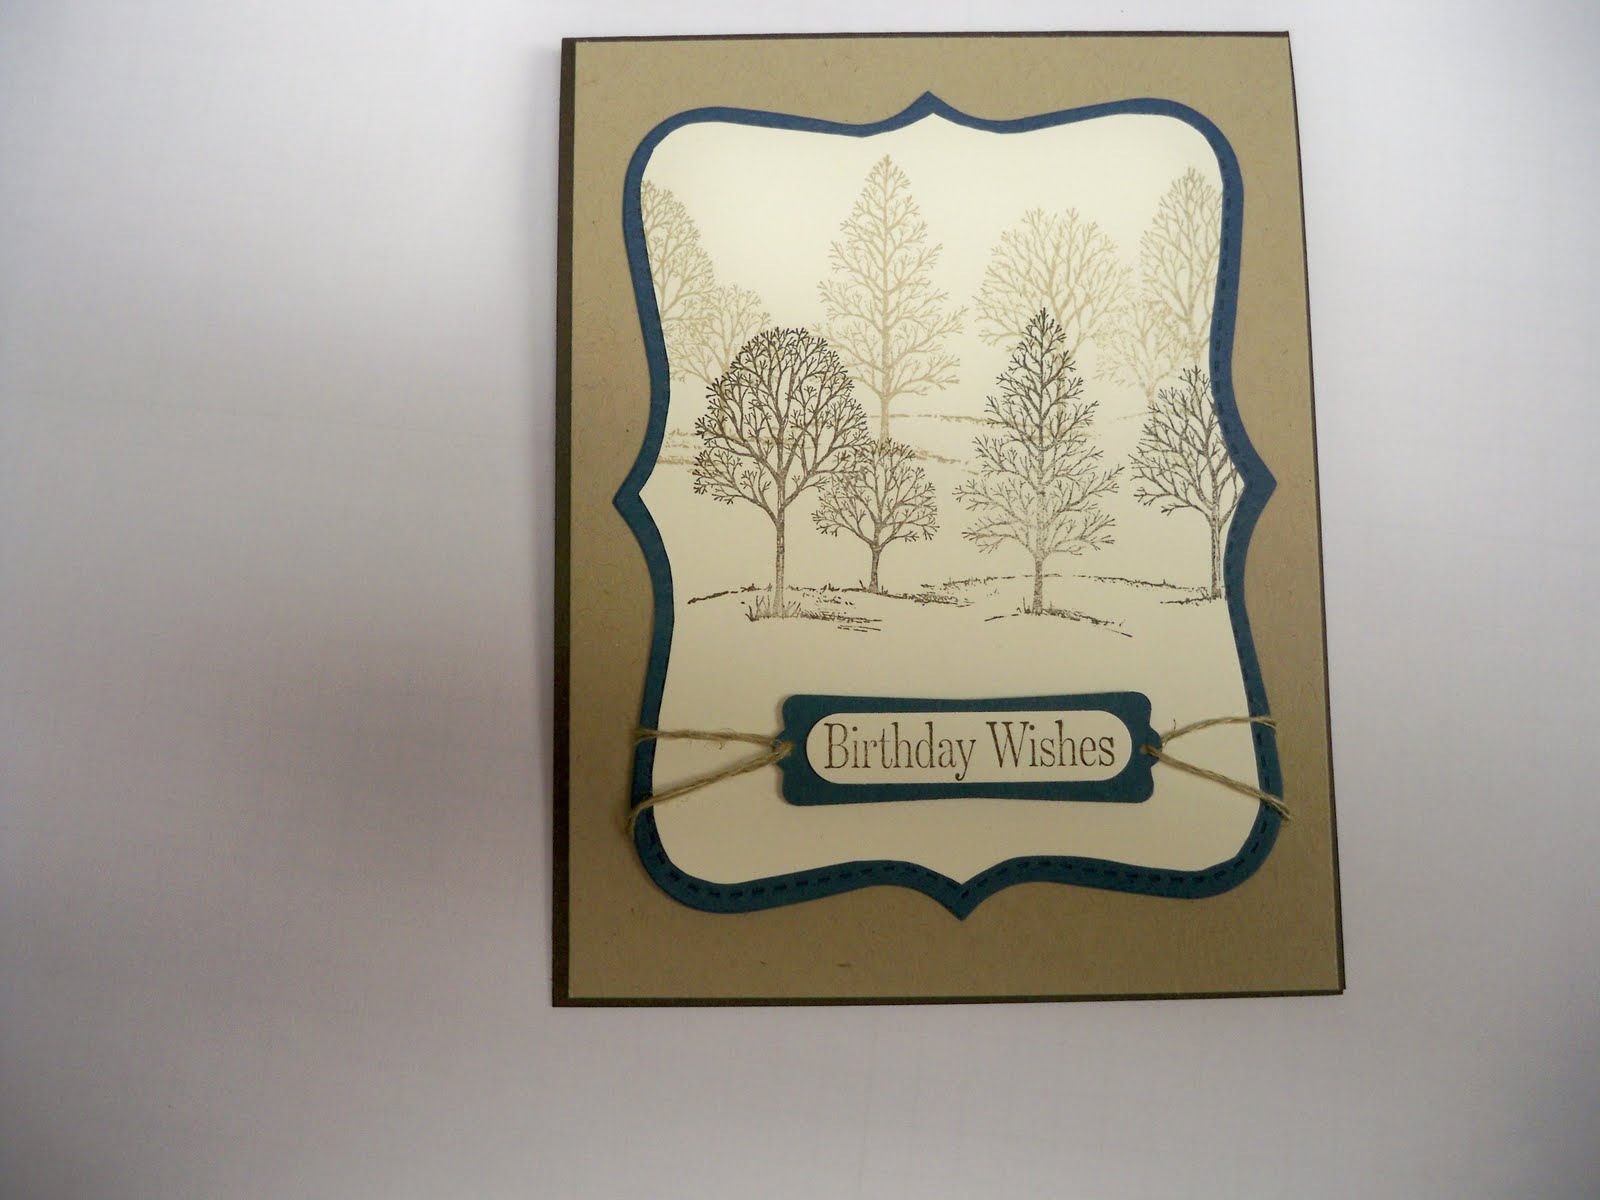 And this beauty was made by Sharon:
 An adorable froggy with falanges by Stacey:
 Sock Monkey by Jen:
 And, this is the Make & Take project for the night. Nancy gave us all a lesson in brayering - thanks Nancy!
Love my Divas!!! If you'd like more info on how I run this "club", let me know :)
Friday, February 15, 2008
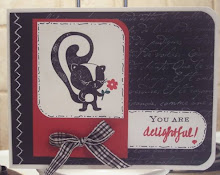
You're Delightful!

I'm at work today, and have DIVA club meeting tonight, so I can't make anything new to show you. This is a card that's been posted in my splitcoast gallery. If you've never checked out splitcoast - you must! But you'll have to sign an agreement not to think less of me when you see where I get all my inspiration :)
This was my DH's valentines card - which I thought was funny since a skunk sprayed our house on valentines morning!
Saturday, August 23, 2008
Fall Winter Catalog with Bind it All
hey everyone! Just wanted to share quickly how EASY it is now to bind your own catalog. ETA: If you purchased a catalog from me and would like it bound, just let me know and I'll do it for your complimentary. If you have a catalog from someone else that you'd like bound, I'll be happy to do it for you for a small fee ($3).  And, the best thing (in my opinion) about it is, you don't have to leave it all alone overnight in some scary, dark staples store. This took about 10 minutes to do! First I carefully cut the cover off as close to the binding as I could. Don't worry about being exactly straight as you have to go back in and trim off this "gutter" edge with your paper trimmer anyway. After the cover was safely removed and gently placed aside (yeah, I'm a freak), I grabbed about 10 pages at a time and ripped them out with my bare hands (yeah, I'm REALLY strong... lol). What's nice about ripping them out in sections is that they stay together nicely until you cut the "gutter" edge off. Once you have them all out and stacked in proper order, just trim off the binding "gutter" edge at 8 5/16 (this is the small hash mark after the 8 1/4 mark) with your paper trimmer. I used my purple cow cutter, which easily cuts 10-12 pages at a time. Then I punched EVERYTHING (cover too as it's the same size as the pages) at the inner pages setting on my bind it all. Once on the bottom edge and then I turned the pages around and punched at the top edge. Remember when you put the binding in, to assemble the book (double check to be sure your pages are in correct order), then fold the back cover to the left and all the way around to the top. The back of the back cover will end up on the top of the stack when you bind. That part is a little confusing I Know... leave me a comment or email me if you have a question and I'll try to explain it better. I know there are lots of instructions, but this really is EASY PEASY.
 The picture above shows that I customized my catalog by cutting down a page protector sheet and included after my cover so I could carry my mini and decor elements catalogs too! There is also another sheet inside the back cover for specials, etc.
This is the card we did last night at Diva Club. The main element is cracked glass. The girls had a good time getting cracked up! Thanks for stopping by today - have a happy stampin' day!
Subscribe to:
Posts (Atom)







 Posts
Posts

