CLICK HERE FOR THOUSANDS OF FREE BLOGGER TEMPLATES »

Tuesday, September 29, 2009

Teacher Frames for Craft Fair

Here are some Teacher frames for my upcoming craft fair. I've had these white frames in my closet for a while. I thought I'd get them out and pretty them up to offer as teacher gifts at my craft fair. The quotes are from an online site and printed out onto Whisper White. Then I chose paper, ribbon, some rubon's and punches to embellish them. They are pictured individually below. I hope someone likes them!

Photobucket

Teacher Frames for Craft Fair


Photobucket

Sunday, September 27, 2009

covered clipboards for craft fair


I'm still working on craft fair items. (the fair will be Nov. 21st at Orhard Hall in sauquiot if you are local). These are some compressed paper clipboards that I picked up on clearance from an office supply store. I chose a variety of Stampin Up papers to cover them with. They even came with the pencil, so I covered that too! I used my stampin up glue stick as the adhesive and it worked great. The papers are also really nice for this project as the reverse side coordinates. I took a close up of one of my favorites, which one is your favorite?


Photobucket

Friday, September 18, 2009

September DIVA Club

Tonight was Jenn's last night at DIVA club. She's moving out of state and we will all miss her! Even though we had a small group tonight, we still wanted to send her off with some love! (disclaimer... Gayla has granted permission for this photo to be posted)

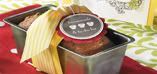
These are this month's technique cards. Lindsay was the hostess this month (even though she was sick and couldn't make mtg). Hope you feel better Lindsay! She chose to do Scratch N Sniff and Faux Wood Frame Techniques. The orange was done using sugar free orange jello and embossing powder and the loaf of bread was done using cinnamon and Embossing Powder... Yummy! Look how the loaf pan shines - it's done using the new Shimer Paint in the Mini. It's also the "brads" on the faux wood frame - love it! The faux wood frame was not my favorite, but actually turned out to be a crowd pleaser! 
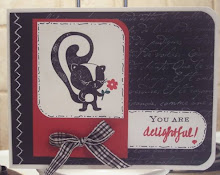
And here is the front of the cards. Our rings are almost complete - only 6 more to go and we'll have all 48 colors of cardstock and 48 different techniques!

And this is the full card we made using the scratch n sniff technique. The acorn smells like cinnamon! The girls used the bright blessings jumbo wheel on the chocolate chip piece too. (When I designed the card I forgot I had the wheel, lol)


Photobucket

cake in a box


Here is an "explosion box" I made for my hair stylist. She is getting married next week (Yea Karie!) so I wanted to make her something a little special. The "card" sides all fold up to form a box, then when the top is taken off, the sides fall down to reveal the 3 tier cake pop up cake die from Stampin Up! The box is made using a 12 x 12 sheet of cardstock that has been scored at 4 and 8 and then turned and scored on the other edge at 4 and 8. Every other score line is cut allowing it to fold up to form the sides of the box. She can put some pictures on the panels so it can act as a little coffee table scrapbook. Cool, huh? The paper used to decorate the box is called night and day and can be found in the holiday mini. Let me know if you need a mini or you can see it by clicking here or on the link to the right --------->
ETA: This is the awesome tutorial I used when making my box


Photobucket

Saturday, September 12, 2009

Stamp Storage - Combining Sets

Well, I did it! I took the plunge and took all my sentiment sets out of their original clam shell boxes and combined them to form large "sets" by category!


Before I broke them up though, I made a master list of set names and gave them a number. For example, the set named Bitty Birthday is #1. I put a "1" on the wood block of each stamp from that set. I did this so I could put them back together if need be.
I also made an excel spreadsheet that lists the box name, the sentiments contained in that box, some keywords (for unexpected uses) and the name of the cube that the box can be found in. I listed the cube name 'cause some sets like just buzzin by have sentiments in them (I didn't break things like this up) that I might not normally think to use, but if I do an electronic search of my excel data base, I'd find them! I didn't save as much room as I thought, but once I get some more of the jumbo clam shells, I can cut down on some of the 1 and 2 boxes and combine them all into one. I haven't worked with the system yet, but I think I'll like it! Hope this helps explain things. If you have ?'s let me know. Pics Above: One shows the different labels on the boxes and the other shows the contents of the box labeled Birthday 2 so you can see what's in there. Some sets that were strictly sentiment sets (like Wonderful favorites and Amazing to Zany, I left as is). What do you think?

Photobucket

Tuesday, September 8, 2009

Craft Fair - home expo items. Altered blocks


Here are some more things for my upcoming craft fair. I spent the morning measuring, cutting, and sanding and this is what I got in return! Aren't they pretty?!? The wooden blocks are from a craft store and then covered with all sorts of pretty Stampin UP Papers (most are retired now). I will make display pictures, notes and recipes in them at the craft fair.


Photobucket

Saturday, September 5, 2009

john deere tractor from punches!


I just remembered (well, was reminded, lol) today that my nephew's birthday party is tomorrow and as usual, I didn't have a card for him yet. He's turning 2 and is in love with john deere tractors! I have seen some of these punch art tractors before (here's my inspiration from Heidi) so thought I'd try one myself! I LOVE how it turned out - so cute! For the background, I sponged on some grass and clouds... which is what that blob of scallops is - a cloud template! I just took some scrap scallops and attached them all together. Start at the top of your card and lightly sponge on ink twisting the template while working your way down, when you're all done, you have a pretty, cloudy sky - perfect for a tractor ride! The balloons are made using the 1/2 circle punch. The tractor uses the large tag and square punches.

Photobucket

jumbo snowflake punch

Here is a card I did for a demo challenge. The challenge was to use a punch and have at least one torn edge on your card. I used the new jumbo snowflake punch. The gorgeous designer paper is from the Christmas Cocoa pack (in the new Holiday Mini). This paper has a bit of a sheen to it and it really is beautimous! The snowflake that is popped up is the reverse side of the paper. Other than that, plain and simple, but pretty don't you think. There is also a bit of dazzling diamonds glitter on the torn edges of the paper to give it some bling!


Photobucket

Wednesday, September 2, 2009

drum roll puleeeze....

The Holiday Mini Catalog is here!

Combine these great new offerings with the hostess special (see button at left) and you can't go wrong! To get the hostess special, I must place the order for you (you can't order directly through my DBWS), so be sure to call or email me if you need something!


Photobucket