


 Happy Holidays everyone! Hope you are all ready for christmas and it's just the fun stuff now! I was asked by one of my bosses to make a cute gift card holder for a gift card from his daughter to his wife. I hope this works for them! Here's the deets:
--I used the top note die to cut the gift card holder. I folded a normal A2 card and placed it on my top note die just insdie the top cut lines.
--After it was cut, I put a scrap of red cardstock back on the die and cut the piece for the inside (this is the piece that the gift card will slip into).
--The reindeer on front was made using the new scribbles swirl sizzix die from stampin up for the antlers, the large oval was used for the reindeer face and a unknown "splatt" punch was used for the hair tuft. I used the 1/4 circle punch for the nose and then flocked it so it was soft.
--The stars and snowflakes on the front of the card and the reindeer names inside are rub ons.
Hope this helps should you want to make your own! They are very quick and easy. Have a good one!
 Hi everyone! Are you all ready for the holidays?!? Only 9 more days - aaaah! I had an order for some gift certificates for Christmas, so I wanted to make a nice little presentation piece for the gift certificates. I used Beate's Criss Cross Card Tutorial found here on SCS. They went together really fast, but I did learn that you MUST use double sided paper for these or else you'll need to cut 2 DP squares. Once you cut the DP in half, it needs to be flipped over in order to fit the other side. (yes, I know that doesn't make ANY sense, but if you try it, you'll see). Instead of lots of extra bulk on the band, I went for a single piece of DP with a rub-on sentiment. I printed the inside pull out piece with the Gift Certificate info and taped it (with repositionable tape) over a piece of computer paper I had already run through the printer so I knew where the printing would line up. Thanks for stopping in and Happy HO Ho HOlidays!

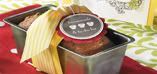
Here's part 2 of my MIL's birthday present. We don't really "do" presents as she would rather we spend the money on the kids' college funds, so I always try to put together a little something with heart. My 11 year old has an ipod and is constantly buying the latest and greatest tunes from I-tunes. I thought it would be fun to make her a mixed cd with all the "kids" music on it so she can stay as hip as she is. Is hip still a "useable" word?!? (just don't tell my kids I said that please) This is the outside view of the holder that I and my youngest son made to hold the CD. It matches her card, which is a couple of posts down.

 This picture shows the inside of the holder and the decorated (and named) CD. Below is a close up of the CD. I stamped the Hambo gardner with staz on ink and then colored in with my bic Mark-it permanent markers (sharpies). I love those things - I got a pack of 36 of them at Staples for around $18! If anyone wants the directions to make these, just let me know and I'll get the measurements posted. Thanks for stopping in and don't forget to pull up your pants before you bend over to garden!!