Monday, May 31, 2010
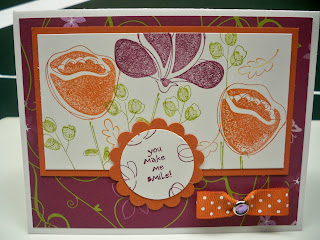
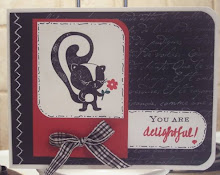
A challenge to be Wicked!

Posted by Tilly at 3:28 PM 1 comments
Labels: Challenge Cards, SCS Challenges, SU Cards
Monday, May 24, 2010
graduation gift card holders
It's graduation time again! My co-worker needed some gift card holders, so I used the My Digital Studio softare to type in the name of the school and the class year, chose the color ink I needed to match the stamped images, copied and pasted and viola - a gift card holder! I printed a full sheet of paper and then used my Sizzix gift card holder die to cut them out. The stamped graduation caps are from the new set called Go, Graduate (Wood Mount $19.95 or Clear Mount $14.95) from the Summer Mini. 

 Thanks for stopping by!
Posted by Tilly at 7:56 PM 1 comments
Labels: Gift Card Holders, MDS, SU Projects
Tuesday, May 18, 2010
My Digital Studio - Clear Mount DVD case insert
Today I have a fun MDS project to share! I've decided not to wood mount these stamps and instead, I'm storing them in one of Stampin' Up's! new plastic DVD style case. They all fit into one slim case - LOVE IT! The new clear mount stamps you get from Stampin' Up! come in these cases and have a great insert that shows the stamp images on the front and down the spine, so I created my own insert. I can't take all the credit though, I've seen some done on blogs and such, but I did import all my own images, and create my own margins, so I guess it's kinda mine, lol! Here is my first whack at it! I really was pretty easy once you fool with the margins and stuff. Now I have a template I can use for any future sets I decide to unmount. What do you think?

Posted by Tilly at 12:19 PM 1 comments
Labels: Clear Mount, DVD Case inserts, SU Projects
Saturday, May 15, 2010
doodle factory creatures
Today I have some cards that I made for a friend. She has the same goofy sense of humor as I do, so I know she'll love these kinda "off-color" cards. Please stop reading if you are easily offended!
I made a group of 10 cards using the Doodle Factory Critters (I and II). This first card features Zed who is new. I just love these little guys and I wish that I had gotten the whole new set at the recent stamping expo.
The inside of this card reads "may the simple pleasures be yours today and throughout the coming year". Don't cha just love him... he even has a little green fun flock booger :)
This is Snargle, I like him as he can be for a man or a woman!

 And here's a shot of my workspace after my 10 cards in one day frenzy. Why do I always seem to end up with only 6 inches of space to work in...
Posted by Tilly at 8:05 PM 1 comments
Labels: Non SU Cards, Rubber Room, Twisted cards
Wednesday, May 12, 2010
Red, White and Blue Wheel
Do you ever look at the wheels in the catalog and think, they're cute, but I never use the wheels once I have them. ME TOO! I've recently decided that I will not be afraid and I will cut apart my wheels....yes, CUT APART!!! I know it sounds scary, but look what can come of it! This is a card I made for a Summer Mini Catalog swap. It features the Red, White and Blue Jumbo wheel from the new Summer Mini. Below is a picture of the wheel cut apart, and stored in a CD case (although I may change to a SU DVD case now).
Posted by Tilly at 7:58 PM 1 comments
Labels: SU Cards, Summer Mini, Swaps
Saturday, May 8, 2010
WNY Spring Fest 2010 pictures
If you follow my blog, you probably remember me saying how excited I was to be able to attend the 3rd annual WNY (Western NY) Spring Fest held in Buffalo on May 1, 2010. This is a wonderful event, hosted by Tracy Harp. This year was the biggest year yet with over 100 stampers registering!! We were to make a "shoebox" project for our assigned table. A shoebox project is where you provide and cut all the materials for everyone at your table (usually 8-10) to make your project. Once you are at your assigned table, the projects get passed around and everyone does everyone else's project!... Fun Stuff!!!! This was my shoebox project. It features the Totally Tess set that was available in the Ocassions Mini. The sentiment on the panel reads "My husband told me if I'm gone one more night stamping, he'd leave me.... I'll miss him!" 
Posted by Tilly at 2:26 PM 0 comments
Labels: CNY gatherings, SU Cards, Swaps
Friday, May 7, 2010
From invitaiton to card.....
When we have a wedding to attend, I really like to take the couple's wedding invitation and use pieces and parts to make their wedding card out of. Recently, we received this invitation to a wedding.....
 I did some creative cutting, punching and stamping and this is what I came up with for the wedding card. It is a gatefold card with a "belly band". The black swirls are embossed and have tiny crystals on some of the dots. I also added two bigger crystals on the blue "A" mat after taking the picture. Their names are punched from the invitation with the word window punch and adhered to the front of the card.
 Here is the inside of the card. Again, the black is embossed. I realized after I was all done, that I didn't incorporate the ribbon at all.... maybe I can find a spot for it on the envelope. At least I know they will like the colors as they picked them, lol!
Posted by Tilly at 10:09 PM 0 comments


