CLICK HERE FOR THOUSANDS OF FREE BLOGGER TEMPLATES »

Saturday, January 17, 2009

Happy 40th Junie!

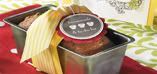
Tonight I got to share a little time with some "old" friends - now by old I don't mean age... even though Junie IS turning 40 now too lol! I love spending time with old friends - there is nothing like reliving your youth with girls you have know all your life! I'm so thankful to have maintained a connection with these truly special girls - even though I can't convince them to stamp! Oh well, I'll keep 'em anyway :) The magnet above was cliped to a gift bag.


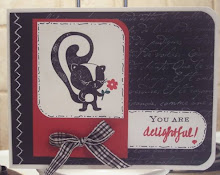
Here's the card I made for Julie (Only I am allowed to call her Junie). The inside reads "remember when we were young and couldn't wait to get older"..... "boy we're we stupid or what?!"


Here's a snapshot of us taken by our waitress. Front is the Birthday Girl, Junie. Then left to right is Lisa, Me and Tricia. Here's to good friends - just don't drink the martini's!

Friday, January 16, 2009

sneak peak - petal pizzaz from Stampin up's Spring/Summer 2009 catalog


Here's another sample for the New Catty Kick off Open House. This one uses the new set coming out called Petal Pizzaz. The scalloped flower is a solid image stamp and the inner flower is also a solid image stamp. I used my Stamp-a-ma-jig to line the centers up and then put a white eyelet in the middle. The red accent is a left over piece after I cut a top note using my top note die in the bigshot, then turning it 180 degrees and cutting it again - kinda into a squareish shape. After you do this, there are 2 of these pieces left over and I think the resemble parenthese (sp?). Anyhoo, thanks for looking - have a great one!

Thursday, January 15, 2009

New Catalog Bookmark Wish List


Hi there! I'm so excited that that new catalogs are now arriving. I have all of the ones that I pre-ordered, but I was a little late in getting these bookmarks ready to give out with the catty's - so anyone who has already picked your catty, please remind me to give you one of these cute bookmarks. I found the template for the printed side a while ago on splitcoast. If anyone needs it, email me and I'll be glad to send it to you. Sadly, I can't post word documents on my blog :(

After printing and cutting them, I backed them with some close to cocoa dp, then stamped a flower from the new set called Petal Pizzaz on the front and added some ribbon. The perfect way to keep your wish wish close at hand! Thanks for looking. If you still need a catty - email me and we'll figure out how best to get one in your hot little hands! Cost is $10... or $7 if you've placed an order with me since the last catalog!

Tuesday, January 13, 2009

Big Shot

Big Shot Spoiler:

Okay you are all going to want to get the Big Shot now! You are going to love the textured templates. They are a great deal -- for only $11.95 you get 3, 2-sided templates. That's less than $2 per texture!

Coming in February - Big Shot Pop-Up dies. You will be able to get a die to make pop-up cards. The dies will cut out all of the pieces you need to make fabulous pop-ups. One is a beach ball and one is a three-tiered cake. The three-tiered cake comes with candles for a birthday or a miniature bride and groom.

Coming in March - Embossing folders!

Wowza - can't wait to get more big shot accessories to play with and show you! I have one new one to show you at my new Catty Open House this Sunday from 12-4 in the Rubber Room - hope to see you there!

Saturday, January 10, 2009

Another Stampin Up sneak peak with Petal Pizzaz


Here's another sneak peek at a brand new stampin up set. This card is made using Petal Pizzaz. These are a bunch of solid image flowers and leaves. There are 2 different stamps used to make the flower and the leaves are from this new set too. The stem is made by free hand cutting a strip of kiwi kiss paper and then crimping it. The designer paper is from the new designer paper called Raspberry Tart. The word love is cut using my naturally serif alphabet die and the big shot. The "U" is some retired chipboard that I colored with Riding Hood Red and then covered with dazzling diamond. Thanks for looking - hope you like it... Love U ;)

Friday, January 9, 2009

raspberry tart and sweet stems - sneak peek Spring Summer 2009

Hi there! Sorry it's been so long since I blogged - I'm having a hard time getting back into the swing of things since the holidays. As a demo, we were able to pre-order some select stuff that will be in the new catalog (which should be here next week!). These two cards use a new set called sweet stems. It's a cute little set that has four different flowers in it. One stamp is used on the card above and another stamp is used on the card below. Also on these cards is new Designer Series Paper called Raspberry Tart - LOVE this stuff - it's sooo pretty. The colors in it are Riding Hood Red, Kiwi Kiss and Pink Pirouette - ooooh.... It's so yummy! These cards are cased from cards found on Splitcoast - I told you I was having a hard time getting my mojo back. When I have times like that (Yes, it happens to demos with all sorts of new goodies too), I find that if I go look for inspiration and create SOMETHING, anything.... even if it's a copy of someone else's design, I become inspired and am back on track quickly.

Here's a belated Happpy New Year wish from my son. The kids thought it would be a good idea to write Happy New Year on their faces with baseball eye black. Not really alot of fun scrubbig that off his face at 1 am! He's my little old man as he always wears his glasses at the end of his nose like that and looks over them - I often wonder why he even puts them on his face?!? And, before anyone turns me in - that's sparkling grape juice :) So Anyway - Happy New Year to you and yours!!


Sunday, December 28, 2008

The rest of the coaster calendar


still more of the coaster calendar


Coaster Calendar for 2009


Hi everyone! Hope you had a wonderful, busy holiday like me!! I'm sad yet glad that it's over. Already, DH has begun installing the molding in the bathroom that we have put off for about 2 months using holiday prep as an excuse. I've been busy doing the piles of laundry that accumulated over the holiday and so far today I have washed and folded 7 loads!

I wanted to share a project that consumed much of my time before Christmas. My son decided during his school break that he wanted to make a coaster calendar for 2009. He and I worked hard one night to finish 3 months and that's as far as we got as a team. I went ahead and finished mine without him (actually 3 of them), and here is the end result. I gave 2 away as presents and kept one for myself. I wish I had made many more of these as I think they are adorable and would make perfect little gifts for those people you want to get something for but not spend alot of money. They are made using six 4 x 4 coasters and bound using my bind it all. Most coasters are stamped directly on, but some have been covered with DP. If you have any questions, feel free to email me and I"ll be glad to try and help.


Sunday, December 21, 2008

stampin up top note die gift card holder - reindeer punch art

Happy Holidays everyone! Hope you are all ready for christmas and it's just the fun stuff now! I was asked by one of my bosses to make a cute gift card holder for a gift card from his daughter to his wife. I hope this works for them! Here's the deets:

--I used the top note die to cut the gift card holder. I folded a normal A2 card and placed it on my top note die just insdie the top cut lines.
--After it was cut, I put a scrap of red cardstock back on the die and cut the piece for the inside (this is the piece that the gift card will slip into).
--The reindeer on front was made using the new scribbles swirl sizzix die from stampin up for the antlers, the large oval was used for the reindeer face and a unknown "splatt" punch was used for the hair tuft. I used the 1/4 circle punch for the nose and then flocked it so it was soft.
--The stars and snowflakes on the front of the card and the reindeer names inside are rub ons.

Hope this helps should you want to make your own! They are very quick and easy. Have a good one!


Monday, December 15, 2008

Christmas Gift Certificate Holder - Criss Cross Card

Hi everyone! Are you all ready for the holidays?!? Only 9 more days - aaaah! I had an order for some gift certificates for Christmas, so I wanted to make a nice little presentation piece for the gift certificates. I used Beate's Criss Cross Card Tutorial found here on SCS. They went together really fast, but I did learn that you MUST use double sided paper for these or else you'll need to cut 2 DP squares. Once you cut the DP in half, it needs to be flipped over in order to fit the other side. (yes, I know that doesn't make ANY sense, but if you try it, you'll see). Instead of lots of extra bulk on the band, I went for a single piece of DP with a rub-on sentiment. I printed the inside pull out piece with the Gift Certificate info and taped it (with repositionable tape) over a piece of computer paper I had already run through the printer so I knew where the printing would line up. Thanks for stopping in and Happy HO Ho HOlidays!

Tuesday, December 9, 2008

Stampin UP Retiring Stamps Fall Winter 2008


Stampin' Up! has released it's retiring stamps list for the Fall/Winter Catalog 2008. These stamps will only be available until January 18th and right now they are being offered at a 10% savings! PLUS - from now until December 23rd you can get FREE SHIPPING!! Also don't forget that w/any $20.00 you spend you get to get ANY of the stamps that are in the sampler for 20% off!
If you'd like any of these stamps and have ordered from me in the past, you can order via phone or email. Or ANYONE can click on the shop Stampin UP link to the right ANYTIME and order through my stampin up website! Happy Retirement - Stamps! Click here or on the golfing stamp image to the right to see the list! Thanks for visiting my blog

Friday, December 5, 2008

Rockin' Grandma birthday gift with Hambo stamps Gardner

Here's part 2 of my MIL's birthday present. We don't really "do" presents as she would rather we spend the money on the kids' college funds, so I always try to put together a little something with heart. My 11 year old has an ipod and is constantly buying the latest and greatest tunes from I-tunes. I thought it would be fun to make her a mixed cd with all the "kids" music on it so she can stay as hip as she is. Is hip still a "useable" word?!? (just don't tell my kids I said that please) This is the outside view of the holder that I and my youngest son made to hold the CD. It matches her card, which is a couple of posts down.

This picture shows the inside of the holder and the decorated (and named) CD. Below is a close up of the CD. I stamped the Hambo gardner with staz on ink and then colored in with my bic Mark-it permanent markers (sharpies). I love those things - I got a pack of 36 of them at Staples for around $18! If anyone wants the directions to make these, just let me know and I'll get the measurements posted. Thanks for stopping in and don't forget to pull up your pants before you bend over to garden!!


Monday, December 1, 2008

christmas gift for teachers - post it note holders


Hi everyone! Happy December... can you believe that it's almost christmas already?!? Are you ready? Did you brave the crazy crowds on black friday? I did, but didn't really get a lot of stuff. It's a tradition with my sister and mom and sister in laws, so it's always fun! Anyway, I had an order for 2 more post it note holders from my craft show last month that needed to get done. She bought the matching note card sets and wanted post it note holders to complete the teacher's gift. This is one of my favorite retired Stampin Up sets, called both way blossoms. I just can't part with it! It's hard to tell from the picture, but the mellow moss one is cuttlebugged on the back layer and then just stamed and colored before inserting it into the holder. The post it notes are attached to the front of the frame with some sticky strip. These are both 3 1/5 x 5 acrylic frames, one is just turned on it's side. Hope this gives someone an idea for a quick and easy, yet cute gift! Happy Holidaze:)

Wednesday, November 26, 2008

harvest moon - hambo stamp card


Happy Wednesday everyone! Is everyone ready for turkey day? I'm not, but I took time out last night to ink up my Harvest Moon lady from Hambo Stamps. They are having a sale until midnight tonight and I promised myself I wouldn't buy any more until I used the ones I had! I made this card for my MIL, who is an avid gardner. Her b-day is coming up and for once, I'm prepared for it! It looks much better IRL, I don't know why the picture is so fuzzy - I really hope Santa brings me a new camera! Anyway, the sentiment reads Happy Birthday to someone who's still got it...

even if it's hanging a little lower than it used to! I know she'll get a kick out of it! She's colored with the aqua painter and ink from the lids of my SU pads.
ETA: I added pattern to the shirt and hat by paper piecing them. I stamped the whole image onto the cardstock, then the parts I wanted the pattern on again onto patterned paper (flowered for the shirt and wicker-ish for the hat). Once the image is stamped on the patterened paper, cut out the piece (shirt & hat here) just inside the lines and glue or pop dot onto the colored cardstock image. The shirt is glued and the hat is popped.

HOLIDAY EXTRAVAGANZA - STAMPIN' UP! SALE!!


Holiday Extravaganza Sale Going On Now!! Shop online for bundles of holiday products for everyone on your list. Bundles priced 20 - 50% OFF. Nov. 26 - Dec. 1. Unfortunately, the site it so busy right now, I can't download or link the sales flyer. If you'd like a copy, please use the link at the right and email me - I'll be glad to email you one!


Click SHOP NOW in the top right-hand corner of my website (click here to go to the website). "Holiday Extravaganza" is listed under "Specials".


Happy Holiday Stamping To You!
Michele, Your Stampin’ Up! Demonstrator

Tuesday, November 25, 2008

cupcake christmas


Tis the season... to start making Christmas cards! I've been wanting to play with my new cupcake ocassions set from All that Scraps. This set was designed by my CNY stamping friend, Diane Zechman, AKA cookiestamper. It is an adorable set that has images for all the holidays as cupcake toppers. This card is called a tent topper card. You make it by folding the card base a bit shorter than normal, so that the topper can stick up and yet still fit in a standard envelope. This base is cut to 5 1/2 x 7, so when it's folded, it's 5 1/2 x 3, then the topper sticks above the card base 1.5 inches. A little tip, have a "normal sized" card next to your tent topper and use it as a guide so you can easily know where your topper should end. Thanks for stopping by today.

Saturday, November 22, 2008

show some stampin' support!


Do you ever wonder if you have the BESTEST group of stampers?!? Well, I'm sorry to say that you can't, 'cause I do! At my basics class today, I had a bunch of my regulars and they surprised me with cake and singing and presents before class! What a great group of ladies I am blessed with - thank you so much! The cake has a bra on it and reads "Michele is 40 let's show her some support" LOL! And did I mention that it was delicious Karen! Holy cow - it has been a week full of cake for me!
Just wanted to share my joy and publicly thank my wonderful group - you guys ROCK!

Thursday, November 20, 2008

Basics Class Projects and Expo mini gift boxes

Has it really been more than a week since I posted?!? Where does the time go? I've been really busy with the the craft show last weekend, work, ortho appts and then of course my milestone birthday yesterday. Today, I spent the morning in my rubber room prepping for my back to basics class on saturday. The three projects shown will be the projects for that class. The students will make all these projects from start to finish. Usually, I prep and pre cut all materials. I want them to feel comfortable with the start to finish process. Each project even uses a left over piece from the previous one. The little mini gift bag pictured is inspired by the many that I made and sold at the craft show.


These are the gift bags that I sold out of at the craft show - they were the big hit at my table. I had a custom order for 11 more, and that's what is shown here. Each mini bag uses a half sheet of cardstock and then you just score and snip it before taping it together. They go together pretty quickly. The tutorial I used to make these bags can be found at www.stampingvideos.com

Tuesday, November 11, 2008

Austins Noble Deer


Hi again! I just got a call from my brother that my nephew got his first deer today! He's 13 and he got a big 7 point buck with his bow and arrow. I made this card quick to send to him as a congrats. This card uses the Noble Deer set from Stampin Up! that recently retired, but I'll never get rid of it as all my brothers and my dad are hunters so it's "their" set... lol! Nothing fancy about this card, but sometimes the ones that go together so quickly are the best ones, right?


Thanks for stopping in again!