CLICK HERE FOR THOUSANDS OF FREE BLOGGER TEMPLATES »

Friday, September 18, 2009

September DIVA Club

Tonight was Jenn's last night at DIVA club. She's moving out of state and we will all miss her! Even though we had a small group tonight, we still wanted to send her off with some love! (disclaimer... Gayla has granted permission for this photo to be posted)

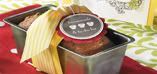
These are this month's technique cards. Lindsay was the hostess this month (even though she was sick and couldn't make mtg). Hope you feel better Lindsay! She chose to do Scratch N Sniff and Faux Wood Frame Techniques. The orange was done using sugar free orange jello and embossing powder and the loaf of bread was done using cinnamon and Embossing Powder... Yummy! Look how the loaf pan shines - it's done using the new Shimer Paint in the Mini. It's also the "brads" on the faux wood frame - love it! The faux wood frame was not my favorite, but actually turned out to be a crowd pleaser! And here is the front of the cards. Our rings are almost complete - only 6 more to go and we'll have all 48 colors of cardstock and 48 different techniques!

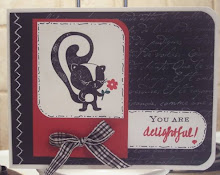
And this is the full card we made using the scratch n sniff technique. The acorn smells like cinnamon! The girls used the bright blessings jumbo wheel on the chocolate chip piece too. (When I designed the card I forgot I had the wheel, lol)


Photobucket

cake in a box


Here is an "explosion box" I made for my hair stylist. She is getting married next week (Yea Karie!) so I wanted to make her something a little special. The "card" sides all fold up to form a box, then when the top is taken off, the sides fall down to reveal the 3 tier cake pop up cake die from Stampin Up! The box is made using a 12 x 12 sheet of cardstock that has been scored at 4 and 8 and then turned and scored on the other edge at 4 and 8. Every other score line is cut allowing it to fold up to form the sides of the box. She can put some pictures on the panels so it can act as a little coffee table scrapbook. Cool, huh? The paper used to decorate the box is called night and day and can be found in the holiday mini. Let me know if you need a mini or you can see it by clicking here or on the link to the right --------->
ETA: This is the awesome tutorial I used when making my box


Photobucket

Saturday, September 12, 2009

Stamp Storage - Combining Sets

Well, I did it! I took the plunge and took all my sentiment sets out of their original clam shell boxes and combined them to form large "sets" by category!


Before I broke them up though, I made a master list of set names and gave them a number. For example, the set named Bitty Birthday is #1. I put a "1" on the wood block of each stamp from that set. I did this so I could put them back together if need be.
I also made an excel spreadsheet that lists the box name, the sentiments contained in that box, some keywords (for unexpected uses) and the name of the cube that the box can be found in. I listed the cube name 'cause some sets like just buzzin by have sentiments in them (I didn't break things like this up) that I might not normally think to use, but if I do an electronic search of my excel data base, I'd find them! I didn't save as much room as I thought, but once I get some more of the jumbo clam shells, I can cut down on some of the 1 and 2 boxes and combine them all into one. I haven't worked with the system yet, but I think I'll like it! Hope this helps explain things. If you have ?'s let me know. Pics Above: One shows the different labels on the boxes and the other shows the contents of the box labeled Birthday 2 so you can see what's in there. Some sets that were strictly sentiment sets (like Wonderful favorites and Amazing to Zany, I left as is). What do you think?

Photobucket

Tuesday, September 8, 2009

Craft Fair - home expo items. Altered blocks


Here are some more things for my upcoming craft fair. I spent the morning measuring, cutting, and sanding and this is what I got in return! Aren't they pretty?!? The wooden blocks are from a craft store and then covered with all sorts of pretty Stampin UP Papers (most are retired now). I will make display pictures, notes and recipes in them at the craft fair.


Photobucket

Saturday, September 5, 2009

john deere tractor from punches!


I just remembered (well, was reminded, lol) today that my nephew's birthday party is tomorrow and as usual, I didn't have a card for him yet. He's turning 2 and is in love with john deere tractors! I have seen some of these punch art tractors before (here's my inspiration from Heidi) so thought I'd try one myself! I LOVE how it turned out - so cute! For the background, I sponged on some grass and clouds... which is what that blob of scallops is - a cloud template! I just took some scrap scallops and attached them all together. Start at the top of your card and lightly sponge on ink twisting the template while working your way down, when you're all done, you have a pretty, cloudy sky - perfect for a tractor ride! The balloons are made using the 1/2 circle punch. The tractor uses the large tag and square punches.

Photobucket

jumbo snowflake punch

Here is a card I did for a demo challenge. The challenge was to use a punch and have at least one torn edge on your card. I used the new jumbo snowflake punch. The gorgeous designer paper is from the Christmas Cocoa pack (in the new Holiday Mini). This paper has a bit of a sheen to it and it really is beautimous! The snowflake that is popped up is the reverse side of the paper. Other than that, plain and simple, but pretty don't you think. There is also a bit of dazzling diamonds glitter on the torn edges of the paper to give it some bling!


Photobucket

Wednesday, September 2, 2009

drum roll puleeeze....

The Holiday Mini Catalog is here!

Combine these great new offerings with the hostess special (see button at left) and you can't go wrong! To get the hostess special, I must place the order for you (you can't order directly through my DBWS), so be sure to call or email me if you need something!


Photobucket

Sunday, August 23, 2009

Build a Bear Card Kits for Craft Fair

Coming up in the Stampin' Up! Holiday Mini (active 9/1/09 - 1/4/10), there are LOTS of great new stamps being released. One of my new favs are these adorable Build a Bear stamps. There are also a bunch of Build a Bear bigz dies!

Here are 2 kits that I will be offering at an upcoming Craft fair. They will include envelopes and crayons so the kids can color as they choose and send off. Aren't they the cutest!


Photobucket

Sunday, August 16, 2009

Sock Monkey Stationery Set


Here's a peek at a stationery set that I made after demonstrating how to cut and score the box and top at my class on Saturday. We were using the Oval All stamp set at class and one of the attendees (Arlene) noted that it would be cute done with Sock Monkey, which I just got 'cause Tyler REALLY wanted it.
The matchbox holds all of Sock Monkey's accessories. All the receipent has to do is color the mokey and choose the accessory and then add it to the card to customize for the occasion! Cool, huh? ETA: Here's a link to Jackie Topa's excellet tutorial that I used as a starting point.
Photobucket

Thursday, August 13, 2009

U Rock birthday card and wish


I can't believe my oldest is almost a teen-ager! Only 1 more year:( Happy Birthday Bubby! I made him a card using the new extreme guitar image from Stampin' Up. The brick wall background is made using a stamp my friend Linda gave to me. She made this faux brick using left over rubber from her SU stamps! Cool, huh? As I posted the card, I realized that the brick probably would have looked nicer if I had stamped with a couple of shades of brown and red onto creamy caramel. That way the "grout" would have been darker. I also used my spritzer tool to give the brick some texture. We took the boys out to Applebees's last night as I have to work tonight. Cullen wanted to go there 'cuz he knew all the girls would sing to him:) If you see my boy on some sports field near you wish him a happy 12th!!
Photobucket

Monday, August 10, 2009

Happy Birthday to Linda!

It was my friend Linda's birthday over the weekend. Her daughter arranged a nice brunch for some stamping ladies and we all brought some of our "well loved" stamps to garage sale to others. This is the little gift that I made for Linda. I purchased the note cube at Michael's. The clip was loose, so after I covered the wooden block with pretty paper, I put in a dab of crystal effects and then re-set the giant paper clip.


Thanks for a nice day Renee and Happy Birthday Linda!

Photobucket

Thursday, August 6, 2009

S'more Beer Thank you...


LOL, this is a card I made for a co-worker who asked for a card that she could send to some friends that hosted her at their camp last weekend. I'd been wanting to try the S'more texture that I saw here. I used my Stampin Up! Small dots texture plate and then scored with my scorepal to make the "crackers". Can you see them? Since they did quiet a bit of drinking at camp, I also thought it would be cute to have the bear holding a big frosty mug! Quick and simple, but cute and to the point!
SU Sets: Under the Stars and Cheers to you

Photobucket

Sunday, August 2, 2009

Simple Birthday Wishes - Cupcake stamp from Stampin' Up!


In my post yesterday I mentioned that I'd be sharing a tip with you today on how to mount your simple birthday wishes stamp. This is a large background sized stamp that is designed for quick and easy birhtday kids thank you notes - and adapts to lots other uses! It's the "ice cream" in the card a post down and was the stamp I featured in a card front swap I did a while back. The frosting on my swap card was done using the shaving cream technique - how fun! I made a stencil out of acetate so the sharving cream would stay only on the frosting.
Anyway, when I got this stamp, I knew I wouldn't always want the words appearing on the "wrapper" part of my stamped image. I like to paper piece alot and this wrapper just begs to be pieced. Knowing it woudn't see too much love if I had to use the marker to ink around the wrapper, I decided on a specialty mount. Before I took the protective paper off the sticky foam, I used my kraft knife to carefully cut around the inside of the wrapper to remove the words. Then I put this piece aside and peeled off the backing from ONLY the cupcake piece to mount on the wood block. By leaving the protective paper on the sticky foam, you can easily put it in or take it out to stamp! Cool huh?

Photobucket

Saturday, August 1, 2009

Summer Cookout Kit 40% off and other August specials

This was just posted on my Stampin' Up! Demo website:


We are excited to announce that beginning today, August 1, the Country Living Summer Cookout Kit is being offered at a 40 percent discount--making it just $14.95! And with plenty of summer left to celebrate, it's a great time to take advantage of this huge discount. The Summer Cookout Refill is also still available at its regular price of $9.95. This special offer only goes through August 31, or while supplies last, so contact your customers today--and make summer an occasion to celebrate! Click the picture below for details


$14.95 is a great deal - especially when you factor in that cute stamp set you get! Let me know if you want me to add it on to an order this month:)

Other August Specials:
Spend $35 on stamp sets from the Growing Up section of the 2009-2010 Idea Book & Catalog (pages 74-90) and receive a FREE package of Designer buttons--a $7.95 value! Eligible buttons are Playground Designer buttons, Sherbet Designer buttons or Button Latte Designer buttons!

Purchase the brand-new Décor Elements Growth Chart, only available August 1-September 30, and as an added bonus, receive a free applicator tool with your purchase (a $1.95 value).


Photobucket

Ice Cream anyone?

It's Fat Free! How cute is this ice cream cone? I must tell you that this is not my original idea - it's so hard to have an original idea with so many great resources out there, lol! This one came to me via an email update from Gretchen Barron. You can see her version here. Can you see the texture on the "cone". I wish the picture was better - I used my new stampin up texture plate - called pattern 2 to make it look just like a cone! The ice cream on the top of the cone is made by cutting off the "frosting" from the huge cupcake background stamp called simple birthday thanks. I have a tip for mounting that stamp too that I will share tomorrow.


Have a great day.... I think I might take the boys for ice cream tonight!


Photobucket