


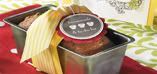
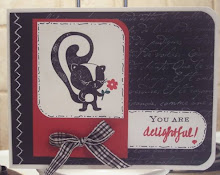
So I haven't been doing alot of stamping for my blog lately, but I have been working on some speical swaps for an upcoming gathering in Buffalo. Well, it's not until April, but it's HUGE, so I figured I'd better get a jump on things. This is a little sneak peek at one of my projects, and a tutorial borne of necessity to go along with it! I needed a "window" in a rectangle, but didn't have a square punch big enough, so I improvised with my large tab punch and it worked like a charm!! Here's what I did:
1. I started with a 3.5 x 3 rectangle
2. Centered my tag punch all the way in and and punched out a tag
3. Then I turned the paper around and lined up the edges to complete the rectangle. Easy Peasy, huh?!?
Hope you enjoy and find some reason to use a "window" in your projects! Wonder if anyone can identify this when we get to Buffalo?!?


2 comments:
Hmmm...I wonder what this will look like later!
great improvising!
This is too cool. I love to be able to show my customers other things to do with punches.
Post a Comment